
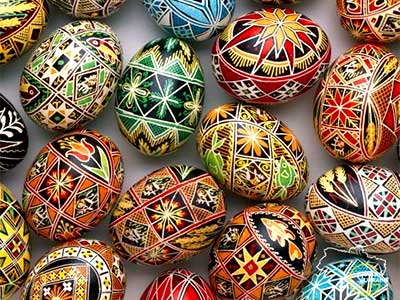
How to paint the Easter egg “pysanka”

The custom of painting the Easter eggs has its peculiarities in each region of Ukraine. Different localities have their own pattern type, color and painting technology. For example, Easter eggs in Poltava are yellow, green and white. In the Chernigiv region pysankas are red, black and white. And in the Carpathian region they are yellow, orange, red and black.
In Hutsulshchyna is used a wax technique of painting the eggs with a special tool. On the South of Podillya and Bukovyna applies the technique of dripping wax on the egg. In these regions pysankas are called “krashanky”, “galunky” and “malovanky”. Colored eggs have appeared considerably later than pysankas. They’re boiled and painted in natural dyes. One can never cook or eat pysanka “not to kill a living force of germ”. They can be given or kept as a sacred talisman.
Before being painted each Easter egg master must have some plan in her mind and layout of elements on the surface of egg. It is important to be patient and do everything consistently: from simple to complex, from general to details.
A wax painting technology of pysanka provides a gradual transition in coloring from lightest to darkest shades by color blending. If the Easter egg must have a green color the corresponding places must be pre-cut with yellow and blue brush. This way we’ll get a green. In the past people used natural dyes: decoction of onion skin, oak and alder bark etc.). Today the aniline dyes for dyeing wool are mostly utilized. To make a pyssanka it’s also necessary a natural bee wax.
We put a cup of boiling water in half-liter cup where we dissolve one teaspoon of dye. To paint the egg we’ll use a homemade special tool. It’s a tiny metal funnel fixed in wooden handle. To start working we need at least three pysanka with holes of different diameters. They must to leave the lines of various thicknesses. In the manufacture of the Ukrainian Easter eggs you should comprise the following:
1. Preparation. We need to choose fresh eggs of chicken, goose or duck. Their shells should be strong and rough. Future pysankas must be washed with clean water and dried.
2. Sketching. We put elbows on the table, take the egg in the right hand and pencil in the right. At the top of acutest end we put cross. Its end should be extended around the perimeter. Thus we get the eggs meridian division into four parts. Also we need to make a transverse division of the egg causing the parallels. If the lines are unequal (it often happens in the first time) they can be easily erased with brush. Experienced Easter egg masters make pysanka immediately without prior sketching with pencil.
3. Applying wax figure. The same thing is with the drawing tool. Before making lines on the egg with it help you need to warm wax. Then you put a tool inside the wax and check the chickness and quality of lines on paper. The tool must be applied perpendicularly and firmly without lifting it from the egg surface. When the wax solidifies, it must be heated on the candle flame. For best drawing you have to clean the tool from time to time. When you put wax on the white egg you protect the ornament places from paint. They’ll be white.
4. Painting. Before the first painting the egg must be immersed in a vinegar solution (two tablespoons of vinegar per cup of water) for 10 seconds. After that we put the egg into the lightest paint (yellow) and hold until it attains saturated color. Than we remove it, rinse with cold water and dry. Then paint with wax again. These places will remain yellow because they are protected from the next paint – darker (for example orange). All colors must be put in this sequence from lighter to darker.
5. Removal of wax. Next the pysanka must be warmed up in oven during 10-15 minutes at 80 degrees. Remove the wax with a cloth. Our pysanka is ready.
Read more: Easter traditions in the Carpathians
-
 27.02.2024
World of pysanka
Embark on a journey into the captivating world of Pysanka, the Ukrainian...
27.02.2024
World of pysanka
Embark on a journey into the captivating world of Pysanka, the Ukrainian...
-
 29.01.2024
Exploring the Treasures of Kyiv’s Lavra Monastery
In the heart of Kyiv lies the venerable Lavra Monastery, a testament...
29.01.2024
Exploring the Treasures of Kyiv’s Lavra Monastery
In the heart of Kyiv lies the venerable Lavra Monastery, a testament...
-
 13.01.2024
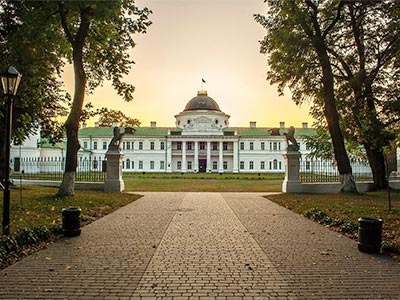
Kachanivka, Eden on Earth
Rich in history, it hosted renowned artists, notably poet Taras Shevchenko.
13.01.2024
Kachanivka, Eden on Earth
Rich in history, it hosted renowned artists, notably poet Taras Shevchenko.